Creating Contacts in CreataCRM
Welcome to CreataCRM!
CreataCRM is used primarily as either a Contact Management System, or Company/Account Management System.
In this document, we will be demonstrating how to create, edit, and manage your Contacts in CreataCRM.
Contacts Overview
Contacts are used for storing the details of individuals, such as First Name, Last Name, Email, Address etc.
Two ways to add new Contacts to CreataCRM
There are two ways to add new Contacts in CreataCRM:
- Through the Global Create Tool
- Through the List View
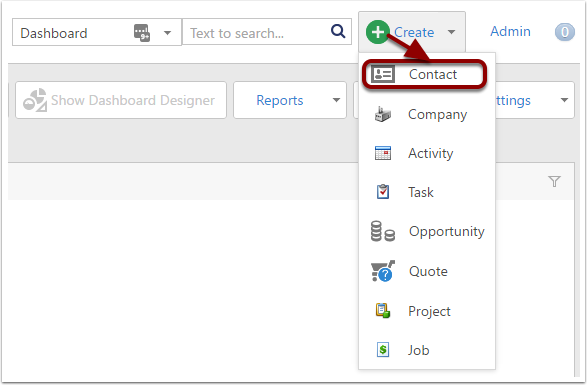
1. Through the Global Create Tool
In the CreataCRM header, you will notice a +Create dropdown. Click on this, and you will be given the option to choose Contact, Company, Activity,task, Opportunity, Quote, or Project. Select Contact, and an empty Contact will be created for you to fill out. once you've filled it out, make sure to Save, so your new Contact is saved to the database.
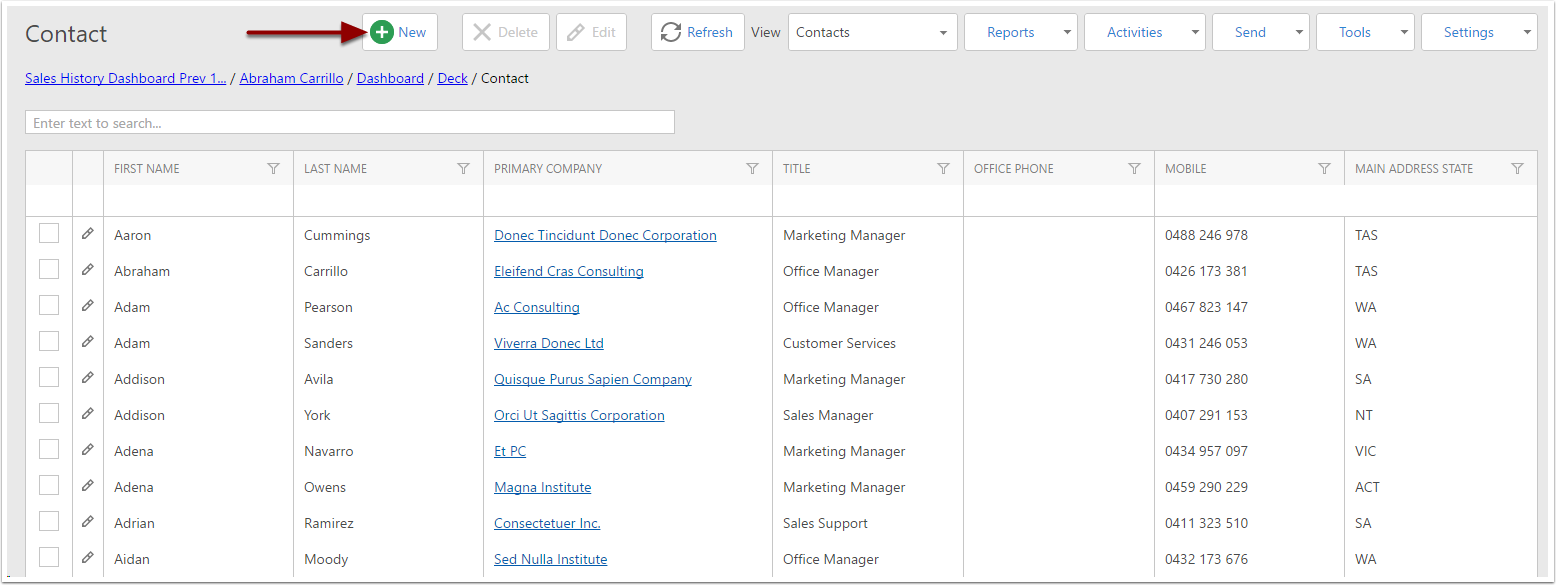
2. Through the List View
When in the Contacts Listview, click the New button in the section header. You will be taken to a screen where you can add the details of a new Contact, and save it to the database.
Entering data into the new Contact
Contact Fields
Contacts already have many fields, but you can add even more fields to suit your custom needs! To add or enquire about custom fields, call our office on 02 9125 0575 to speak with a CreataCRM representative!
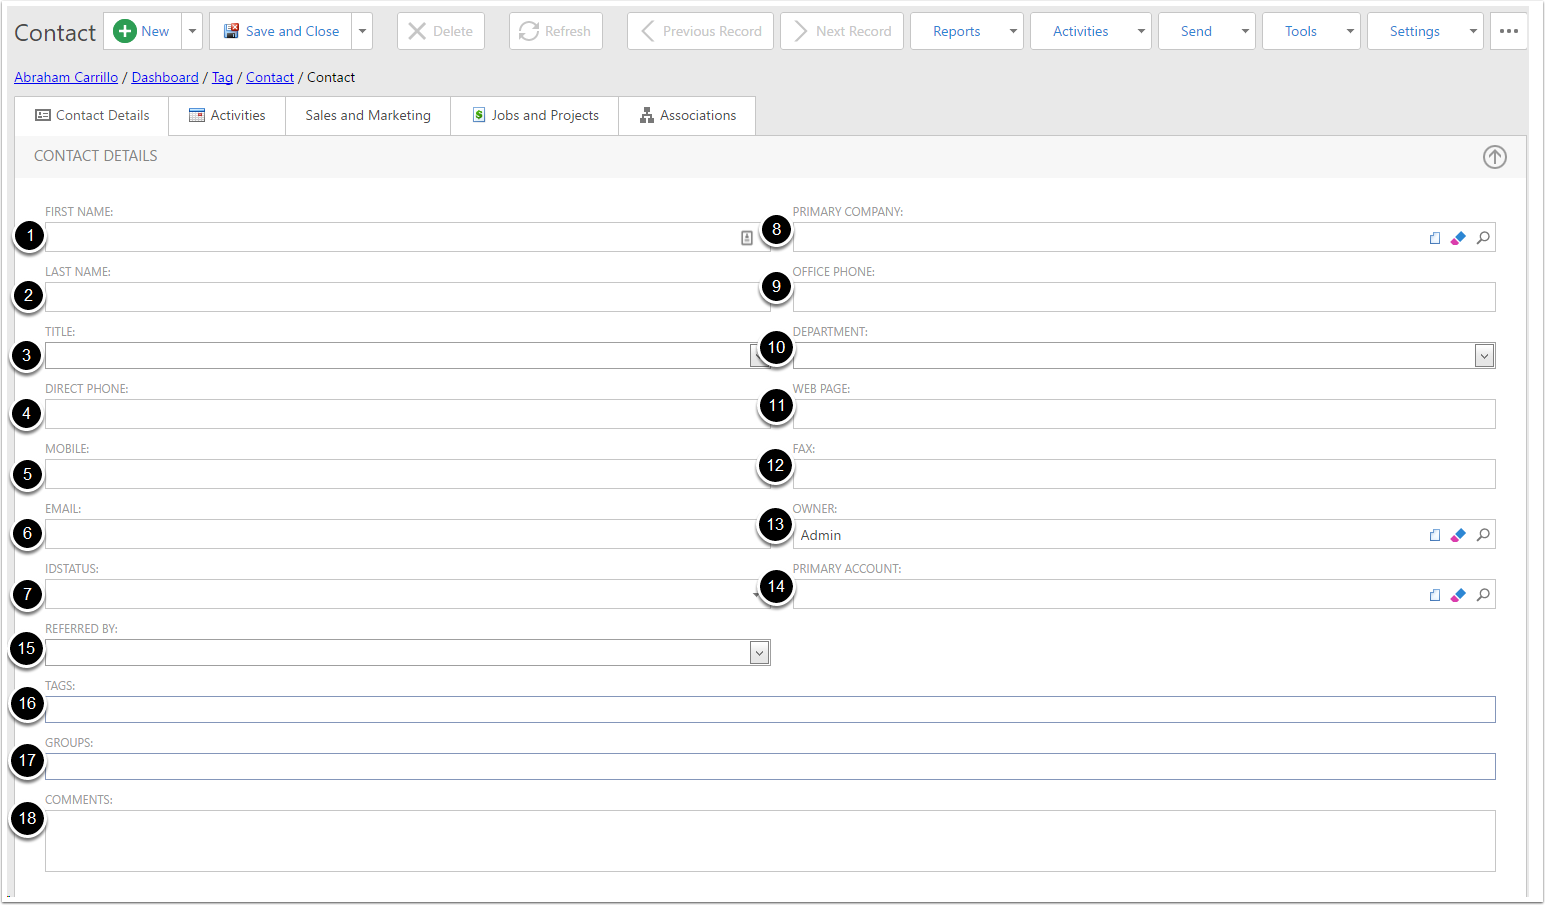
By default, a Contact has:
- First Name - This is for the persons first name.
- Last Name - This is for the persons last name.
- Title - This signifies the persons title (e.g Mr, Mrs, Master, Miss, Dr).
- Direct Phone - This is for storing the persons direct phone number.
- Mobile - This is for storing the persons mobile number.
- Email - This is for storing the persons email address.
- ID Status - This represents the Contacts status.
- Primary Company - This is used to link the new Contact to a Company. A Contact can be linked to multiple Companies, but this represents the Company they are primarily linked to. When linking the Primary Company, if the Company is not automatically found, it will be automatically created and saved into your CreataCRM database when you save the Contact.
- Office Phone - This represents the phone number of the office the person works at.
- Department - This represents the department that the person works in.
- Web Page - This is for storing the address of a website associated with the person.
- Fax - This is for storing the persons fax number.
- Owner - This represents the CreataCRM user that owns this Contact. In most cases, this is the same as Created By
- Primary Account - This is used to link the new Contact to an Account. A Contact can be linked to multiple Accounts, but this represents the Accounts they are primarily responsible for.
- Referred By - This stores who the person was referred by.
- Tags - This is used to add Tags to the Contact. This is useful for giving the Contact multiple classifications.
- Groups - This is used to add the Contact to Groups. Groups work alongside Tags, however Tags are more flexible and widely used.
- Comments - This is used for writing down additional relevant comments/details of the person.
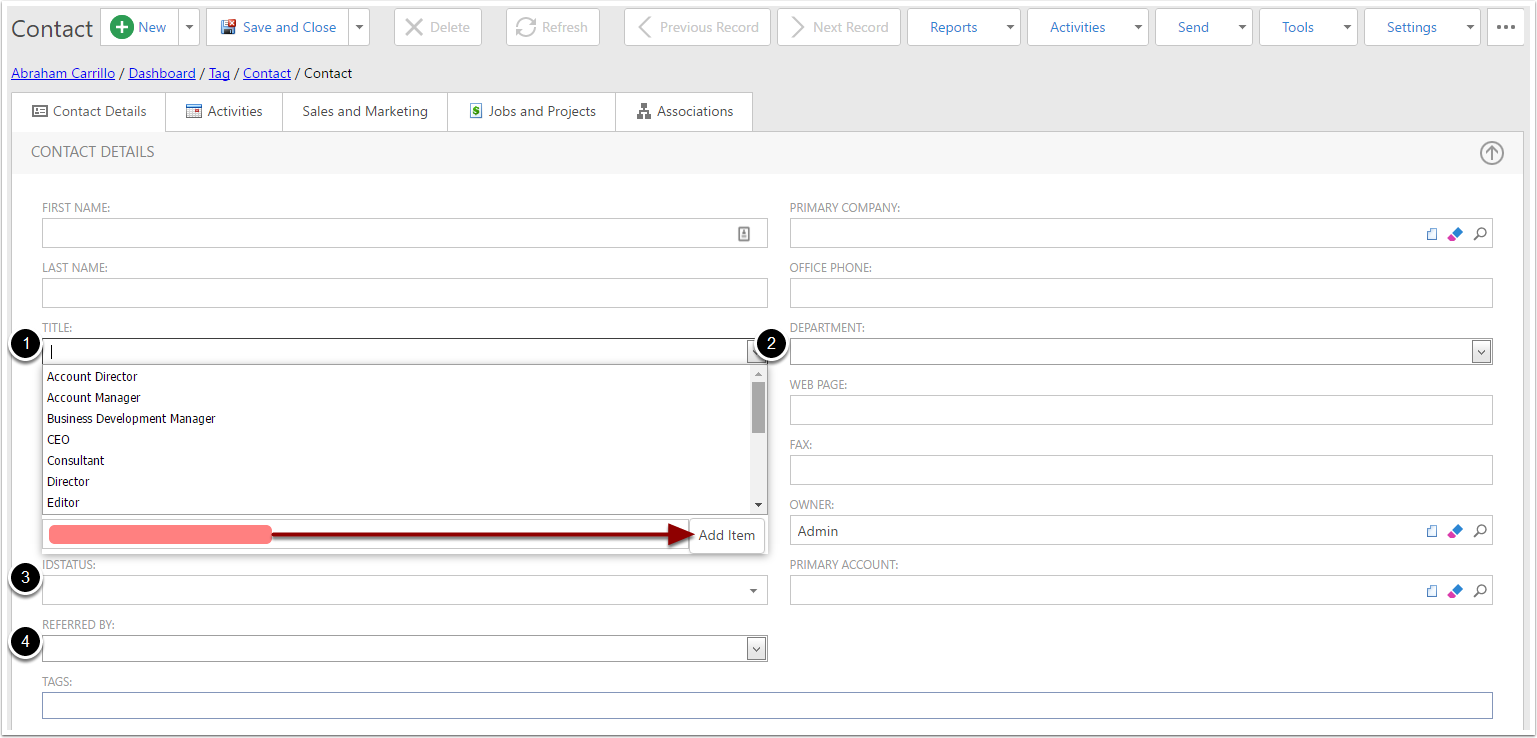
Droplist Choice Fields
Droplist Choice Fields are fields that have a dropdown containing predetermined options to select from.
- Title - A Single Choice dropdown, contains titles.
- Department - A Single Choice dropdown, contains departments.
- ID Status - A Multi-Tick Choice dropdown, contains status identifiers
- Referred By - A Single Choice dropdown, contains refferers.
If the option you require isn't in the given options, you can add it to the list by typing the option into the textbox at the bottom of the list, and clicking Add Item.
Tags
You can add Tags to a Contact through the Tag field. To add a Tag to the Contact, type the Tags name into the search bar, and select it when it comes up in the dropdown (e.g MYOB).
You can remove a Tag from a Contact by clicking on the x of an already added Tag.
To add a new Tag to your CreataCRM database, go to Marketing > Tags, and create a new Tag.

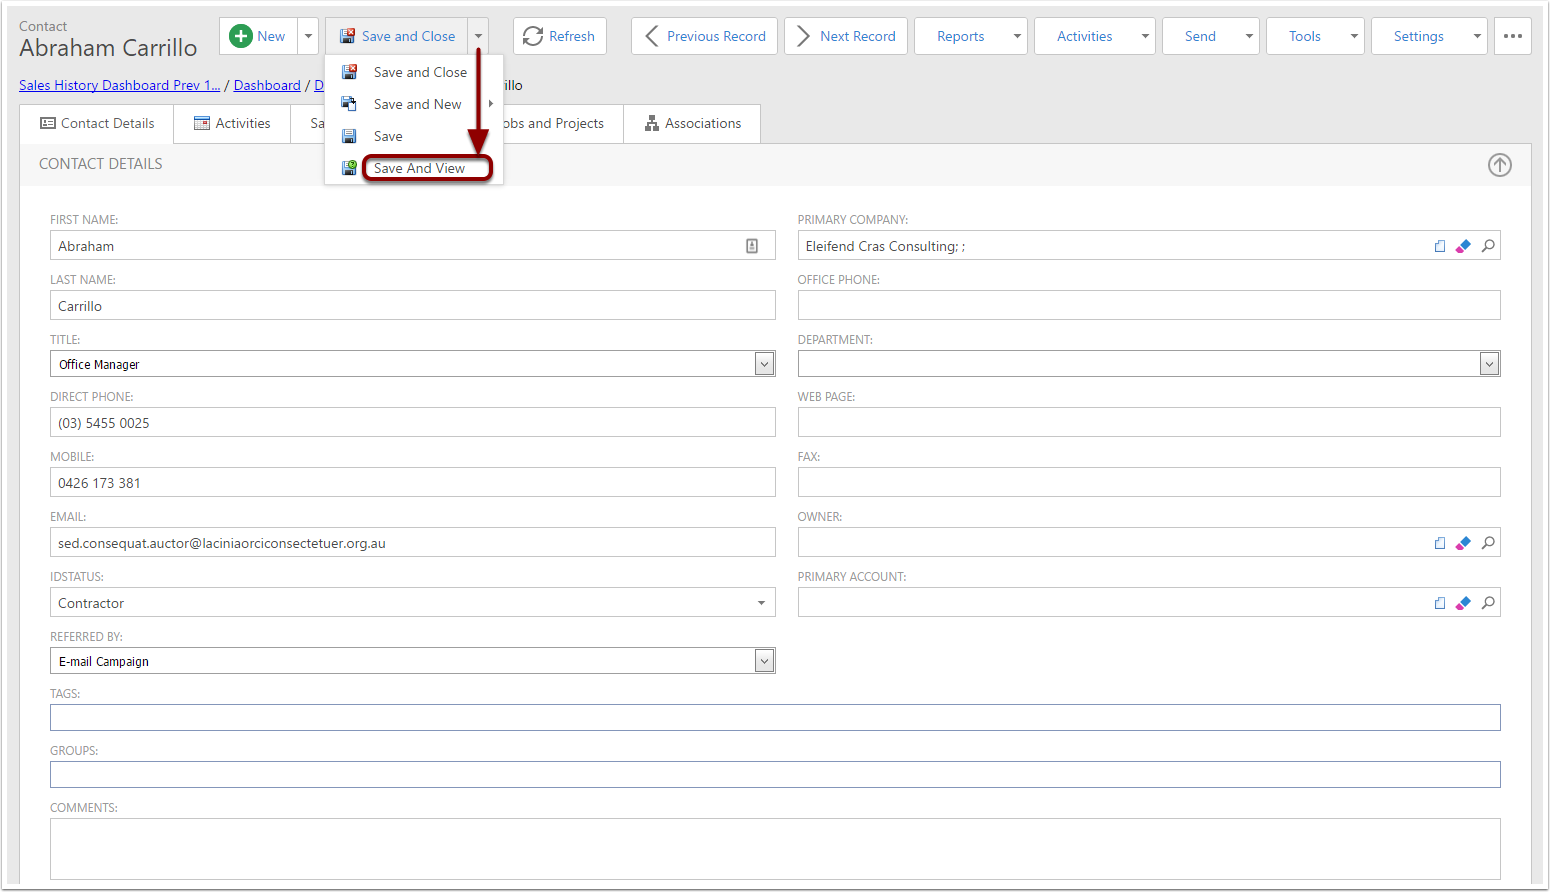
Saving the new Contact
To save the new Contact to your CreataCRM database, use the Save options (located in the section header). There are four options:
- Save and Close - This will save the Contact, then close it, directing you back to your previous screen.
- Save and New - This will save the Contact, then direct you to a new screen with another new Contact. Useful for quickly entering multiple new Contacts to the database.
- Save - This will save the Contact, without redirecting you anywhere. This is useful for saving your progress while you are mid-creation.
- Save and View - This will save the Contact, then show you the Contact in Detail View mode.
Three ways to search for Contacts
There are 3 ways to search for Contacts in CreataCRM
- Using the Global Search Tool
- Searching through the List View
- Filtering columns in the List view
1. Using the Global Search Tool
You can find the Global Search Tool in the CreataCRM header:

Selecting the Search Category
In the Category dropdown, you select what Category you would like to search in. In this case, select Contact.

Running the Search
Once you've selected Contact, type into the search bar, and press the Enter key. You will be directed to a Listview with the search results.

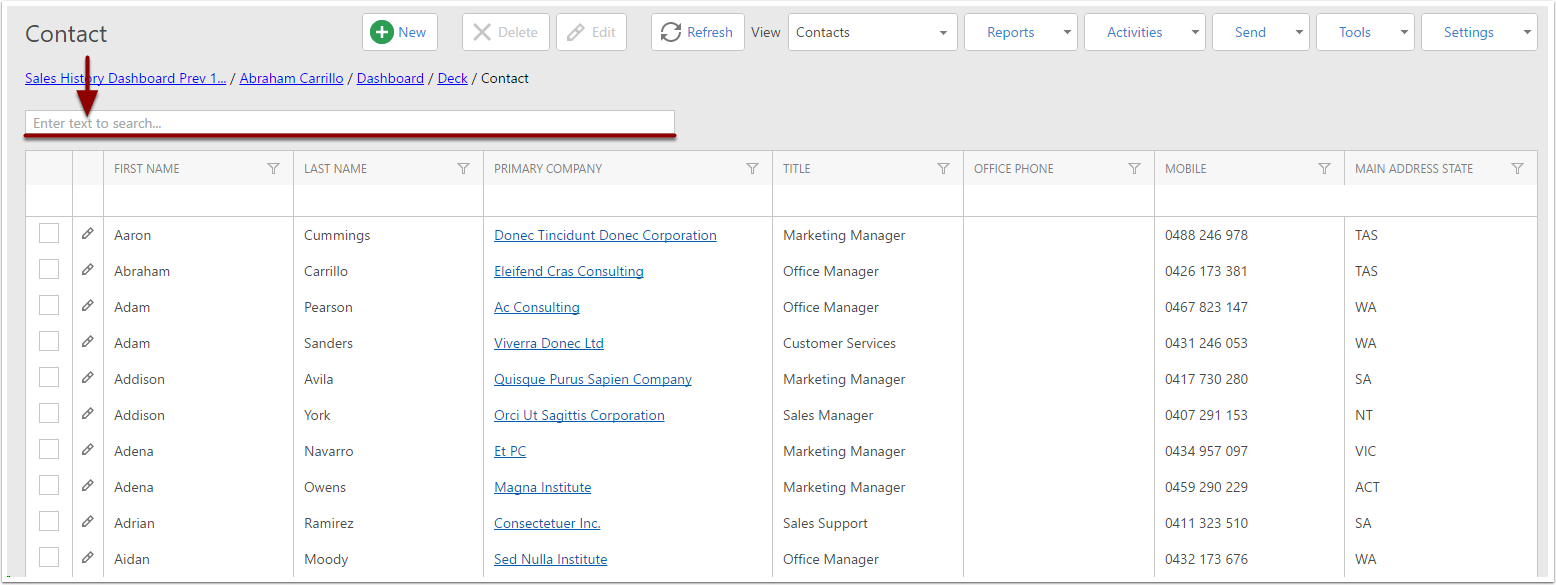
2. Searching in the List View
In the Contacts Listview, you can search for specific records using the Seach Bar (highlighted below). This will search for records that have fields containing the text you type in.
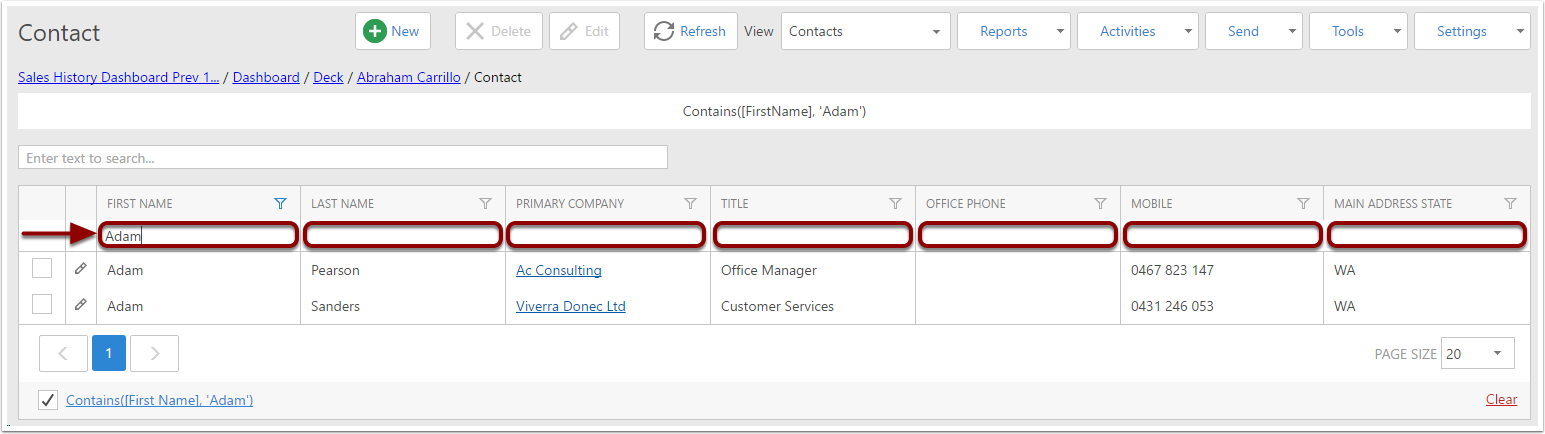
3. Filtering columns in the List view
In the Contacts Listview, you can also filter by a specific column. This is done by typing into the filter box above the chosen column, then pressing the Enter key.
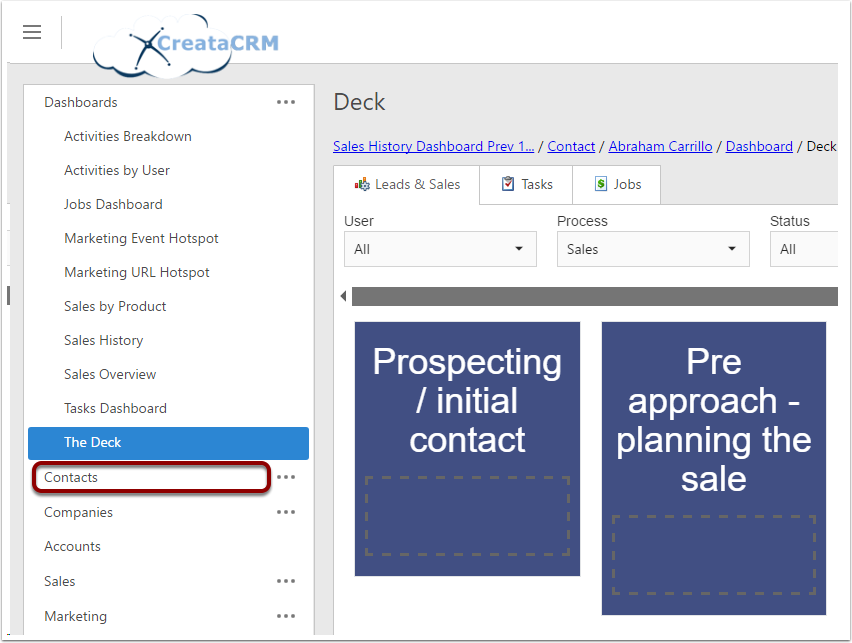
Accessing Contacts through the ListView
To see a list of all the Contacts in your CreataCRM database, you can simply click on the Contacts option, in the navigation pane.
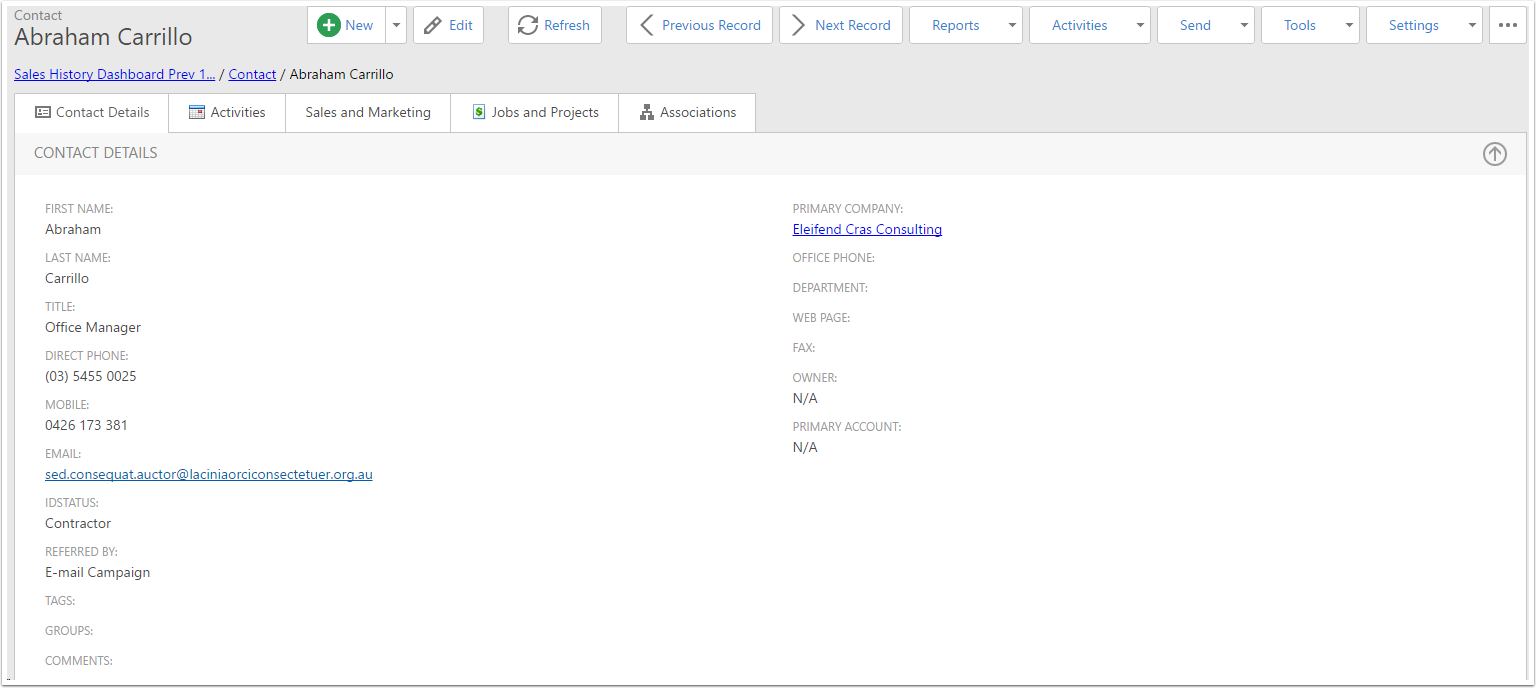
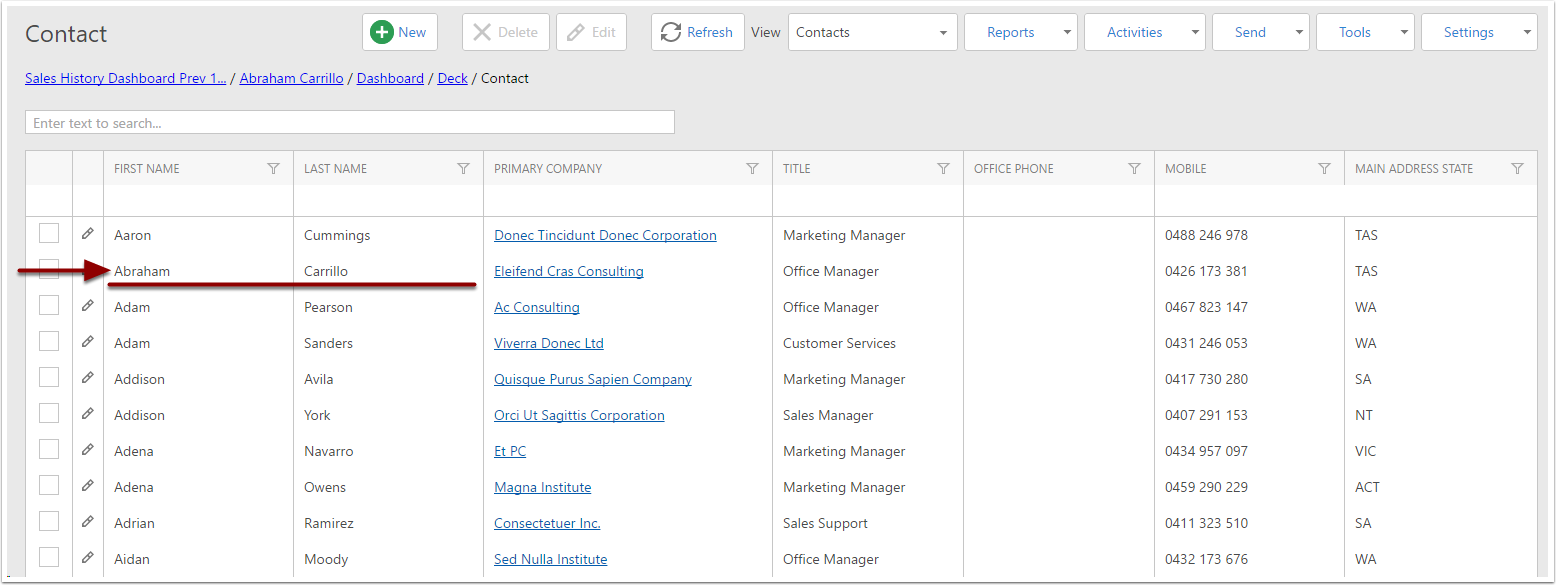
Navigating to a specific Contact
To look at a specific Contact, click on that Contacts First Name or Last Name. You will be redirected to that Contacts Detail View
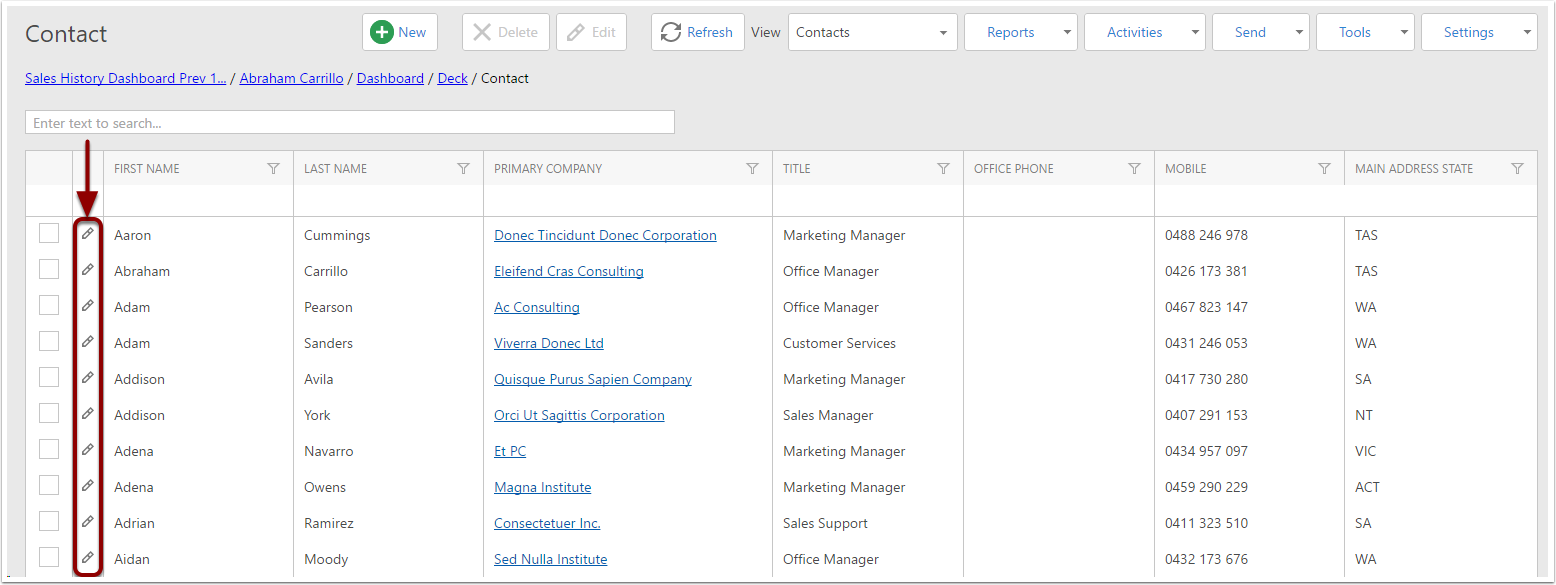
Editing Existing Contacts from the List View
Each Contact listed in the Contacts Listview, has an Edit button (Pencil Icon). Click on a Contacts Edit button, and you will be taken the a screen where you can edit that Contact.
Saving your changes
To Save and View the changes in your CreataCRM database, click Save and View.
