Modifying Email Templates
Navigate to Email Template
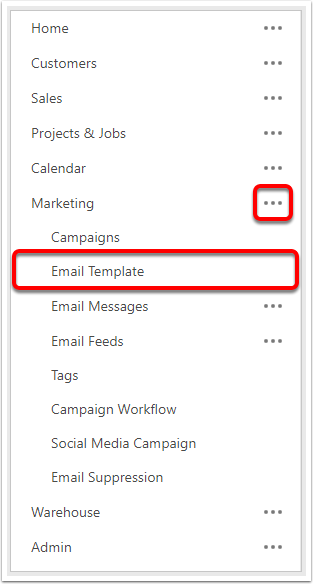
Expand Marketing then click on Email Template.
Edit the Template
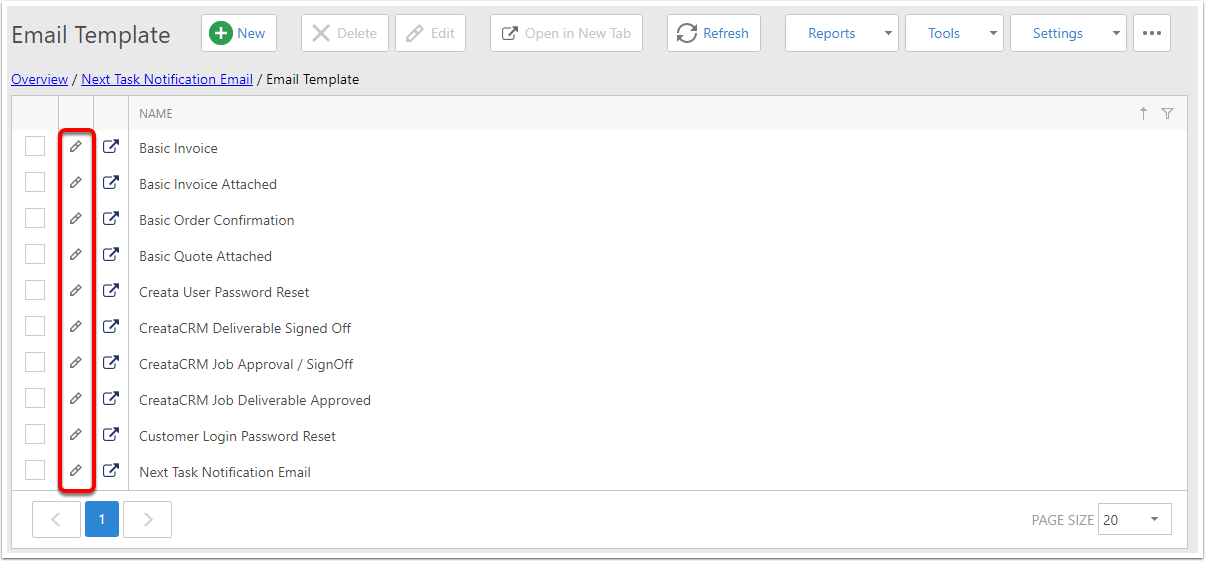
Choose the template you want to change then click the Edit button.
This example will use the Next Task Notification Email.
Designer
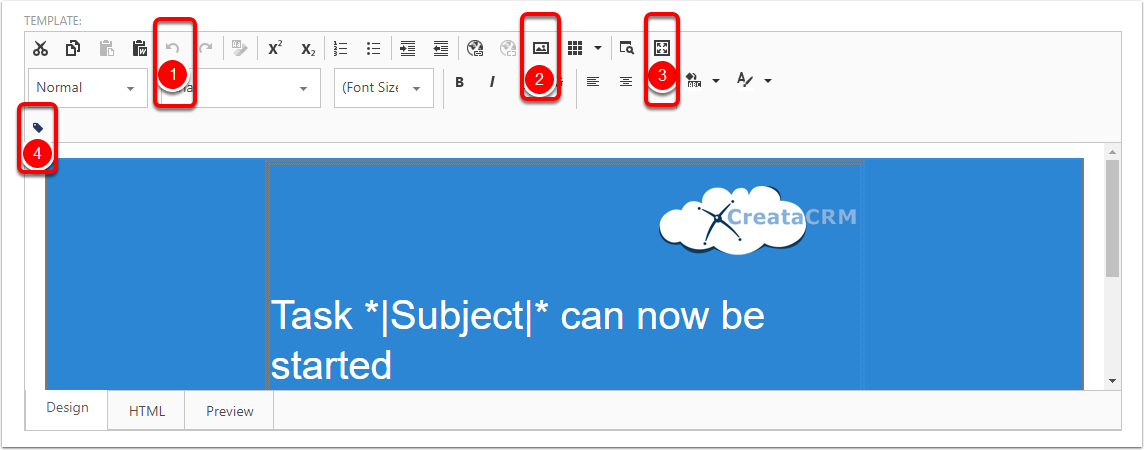
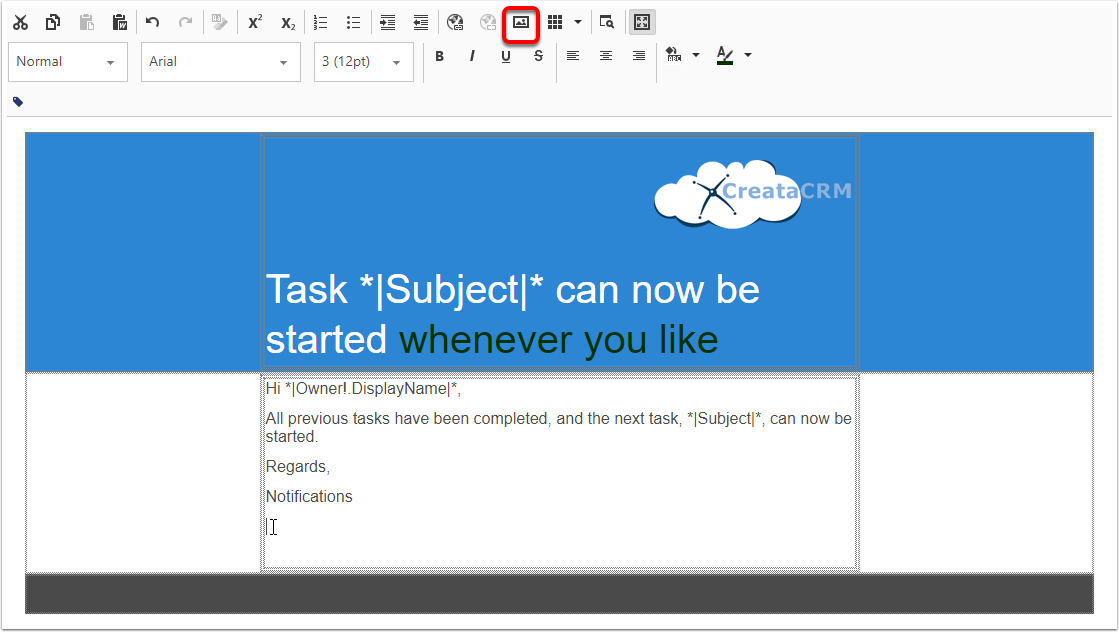
The Email designer is at the bottom of the page, in the Template tab.

useful button explanation
- Undo - revert the last action
- Insert Image - adds an image at the cursor location (see below for more info)
- Fullscreen - makes the editor take up the whole browser window. Useful for editing longer/larger templates
- Merge Tags - adds a CreataCRM Merge tag to the email. These will be replaced with the appropriate field when the template is used.
making basic changes
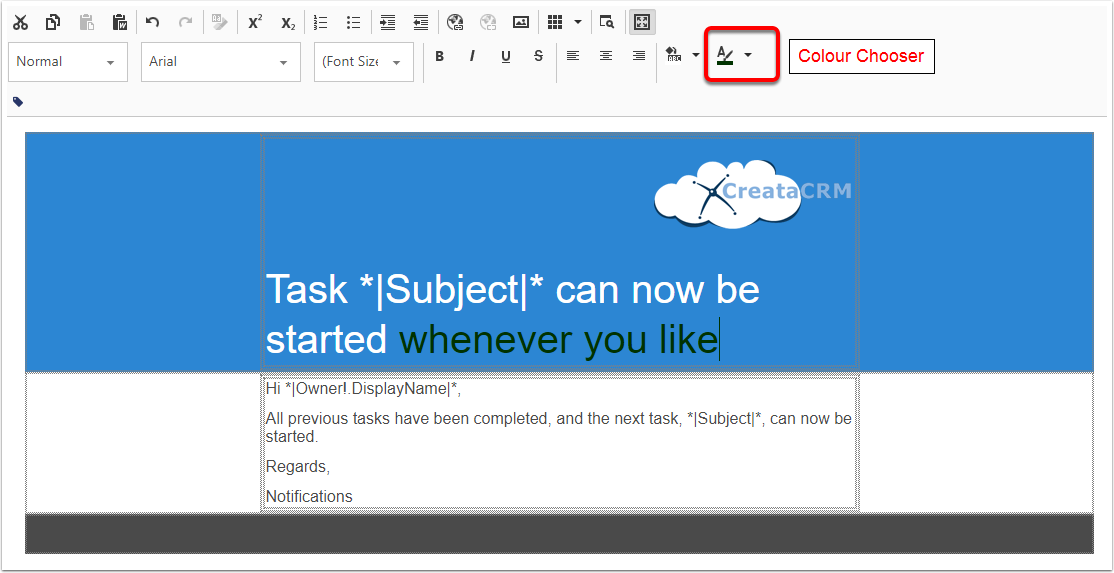
Simply click in the template and start typing, change the font colour by using the right-most button on the second row
inserting an image
click where you want the image to go and click the Insert Image button
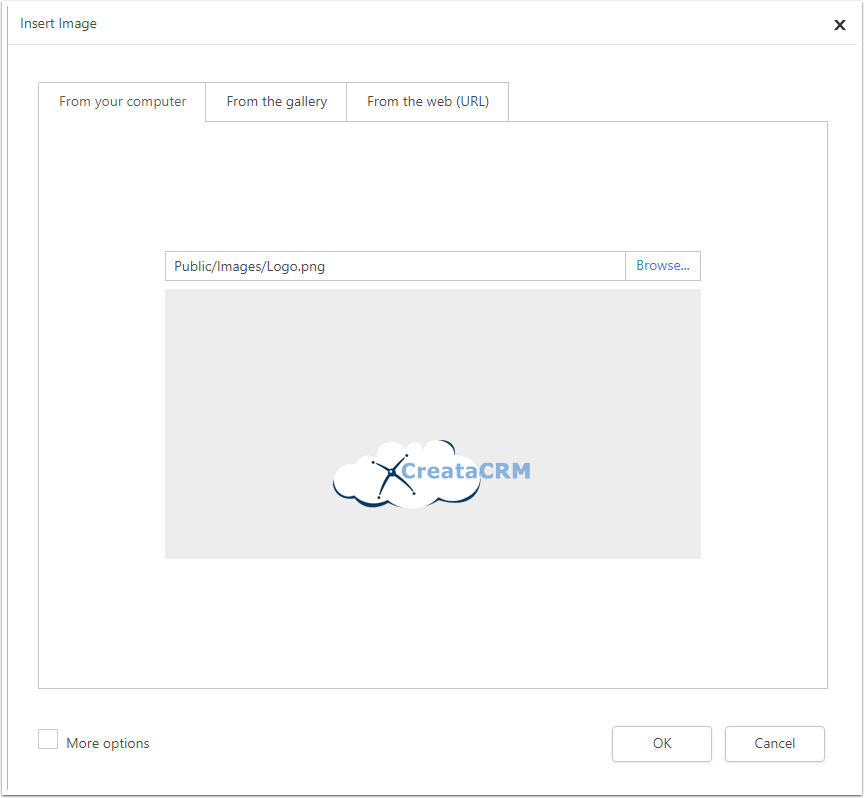
insert image popup - from your computer
click the browse button or drag the image onto the grey box to select it
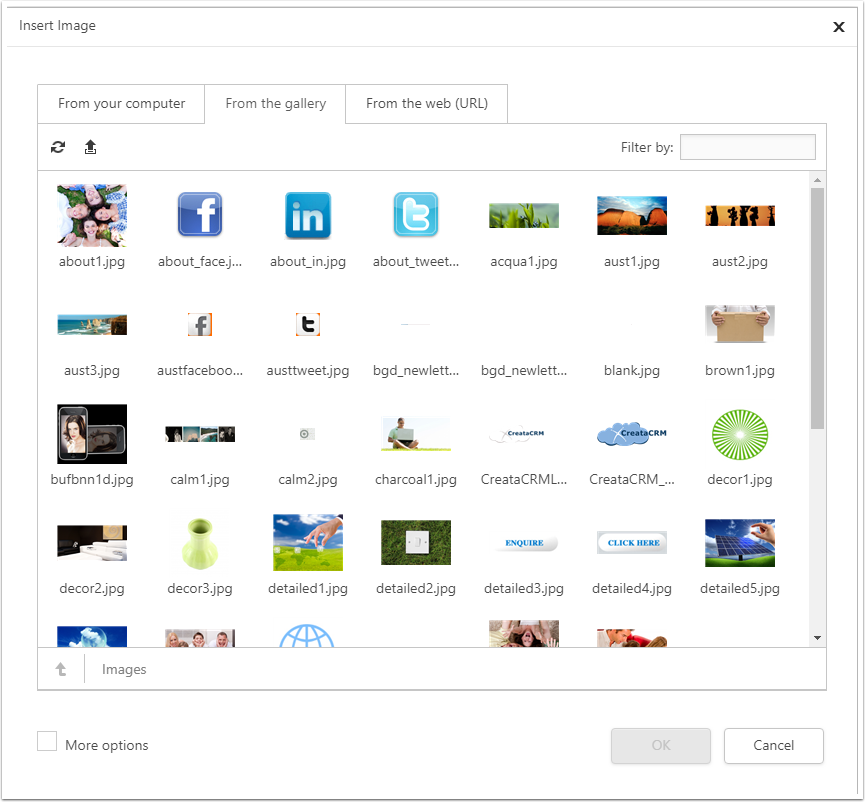
insert image popup - from gallery
choose from files that are already available on the server
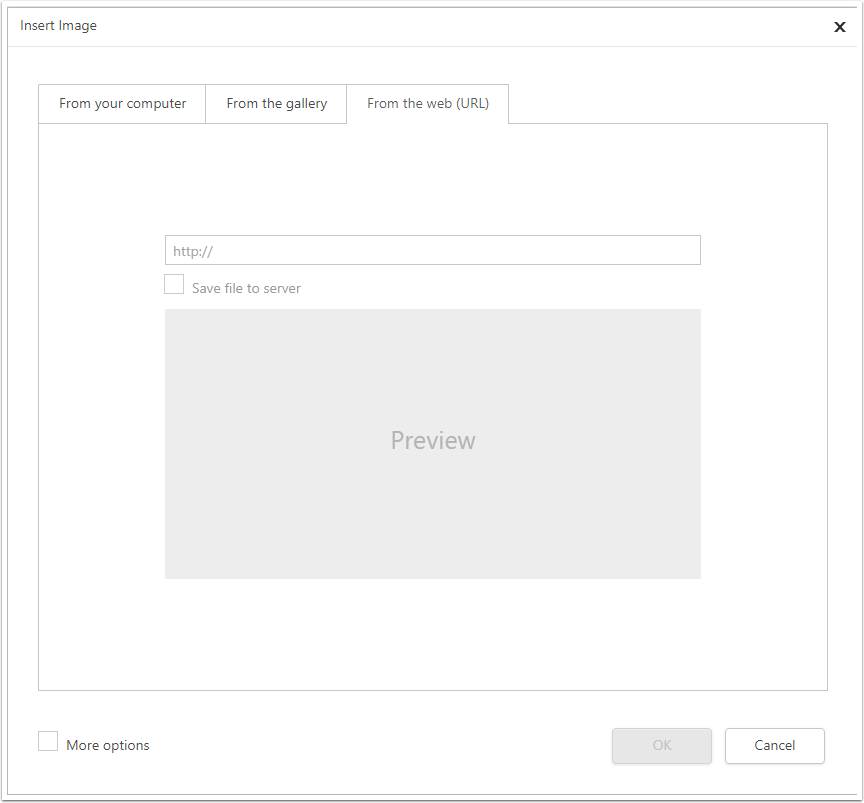
insert image popup - from the web
paste the url to the image to insert from the web
Inserting Merge Tags
Place the input cursor where you want the tag to appear, then click the Insert Merge Tag button

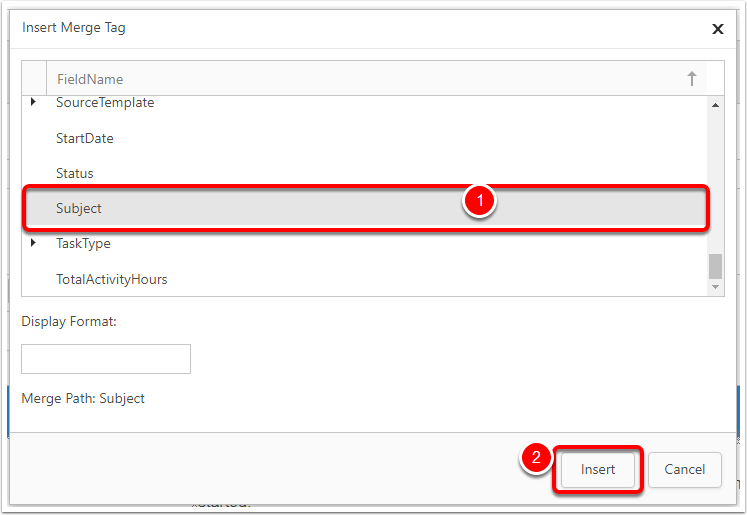
Merge Tags popup
Available fields will depend on the Template's Target Type. Here the target type is Task, so the field list for Task is shown. If we pick Subject, then click Insert...
Tag Inserted
the merge tag will appear. When the email is sent out, the Task's Subject will appear in place of the merge tag.
